Transactions (CTRL+F11)
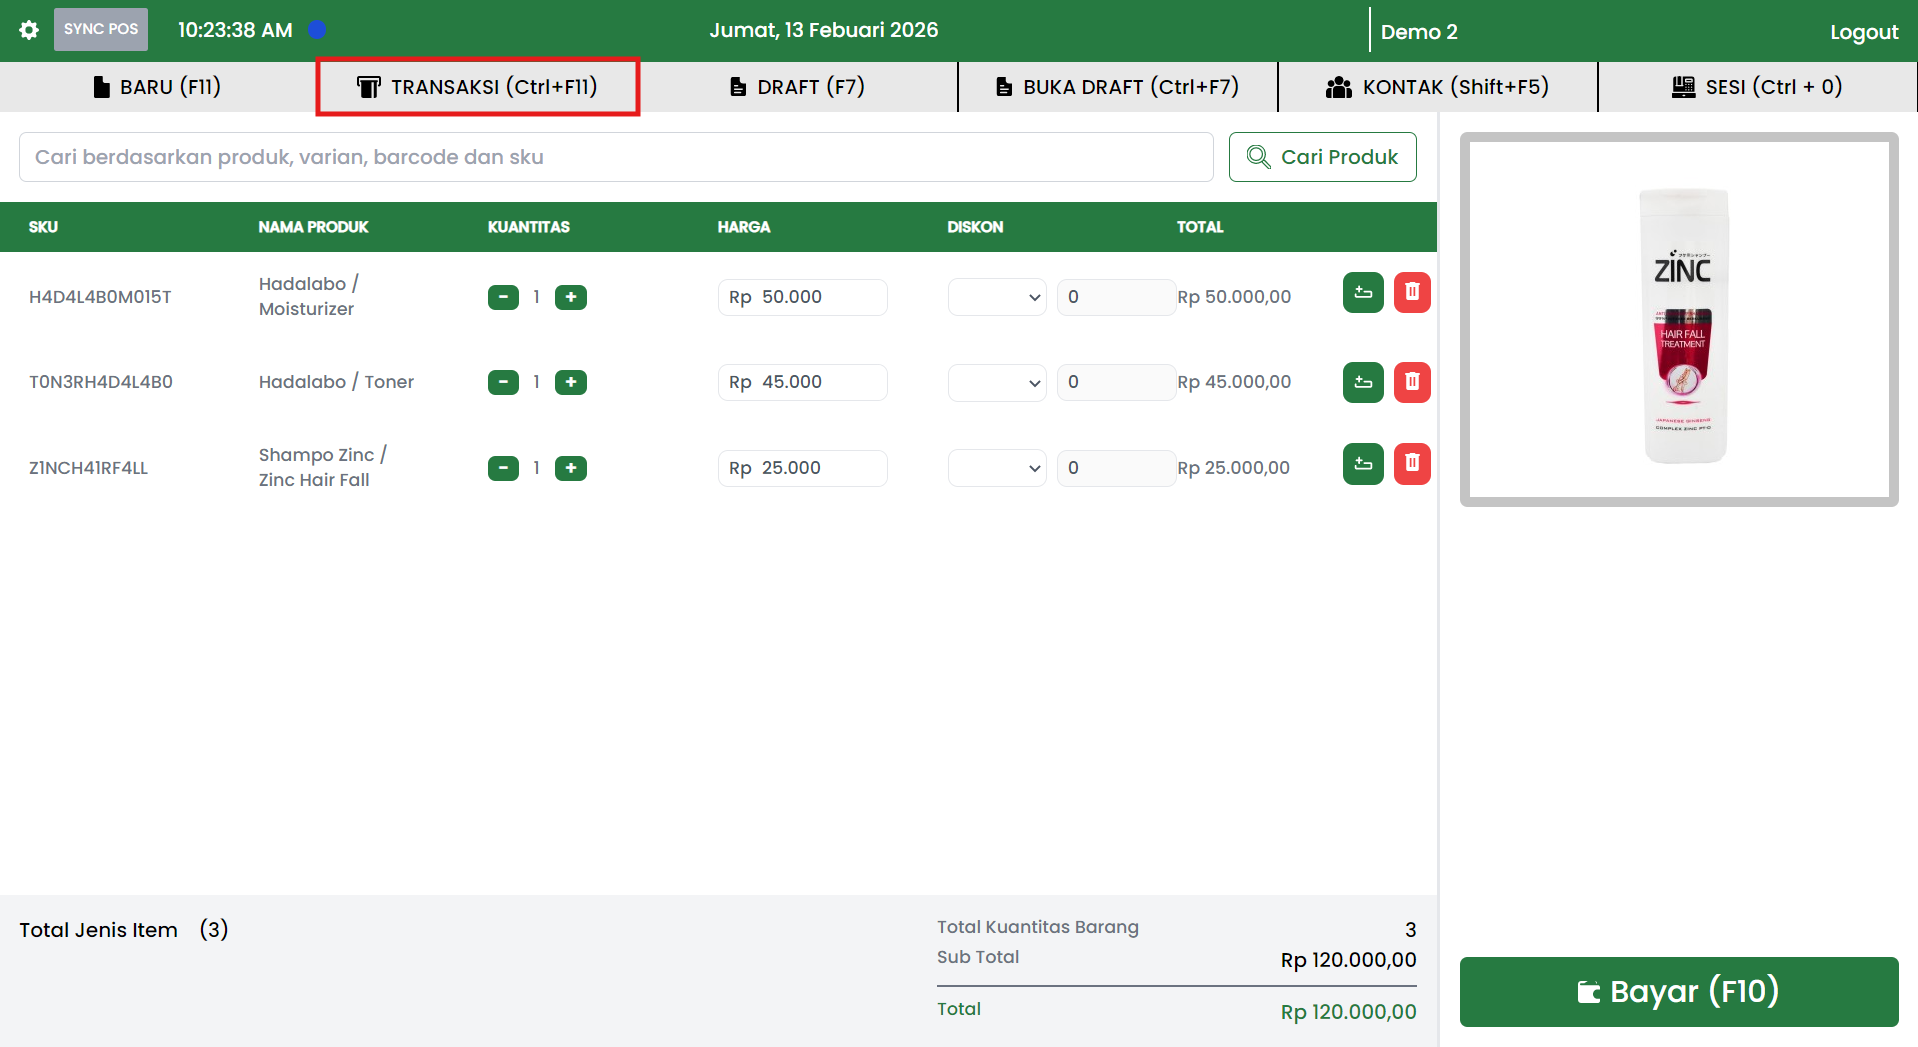
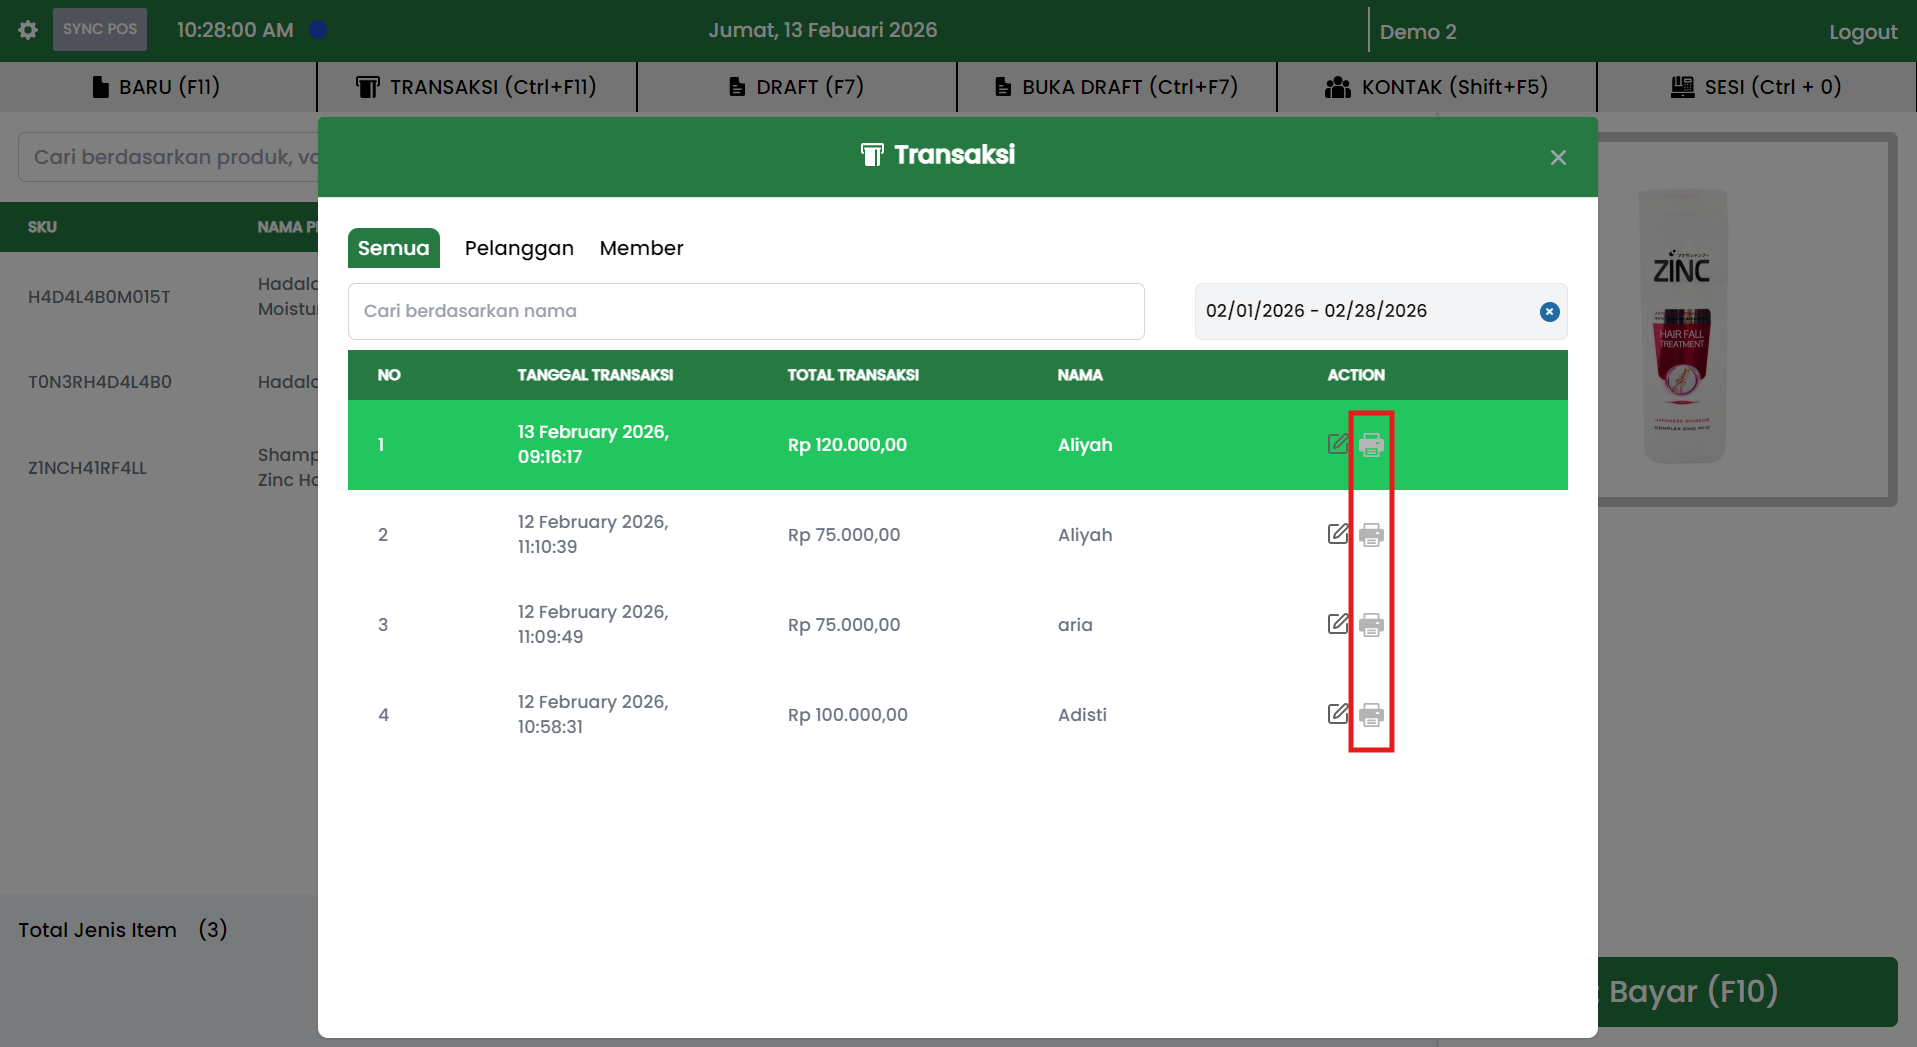
The TRANSACTIONS (Ctrl+F11) menu is used to open transaction history that has been saved. From this list, cashiers can view details, modify transactions (if permitted), and print receipts or invoices.
Because this feature touches recorded transaction data, the system may request a POS Approval Code (authorization) when performing certain actions, especially editing.
Purpose of Transactions
The Transactions feature is used to:
- View saved transactions by period and customer type.
- Search for transactions by customer or member name.
- Open transaction details for review.
- Modify certain transactions.
- Print invoices (store receipts and online invoices).
- Run authorization control using the POS Approval Code for certain actions.
Accessing the Menu
In the POS application, Transactions can be accessed from the top menu:
- TRANSACTIONS (Ctrl+F11): opens the transaction history list.
- NEW (F11): creates a new transaction.
- DRAFT (F7): saves a transaction as a draft.
- OPEN DRAFT (Ctrl+F7): opens draft transactions.
- CONTACTS (Shift+F5): manages contacts (customers or members).
- SESSION (Ctrl+0): cashier session settings.
Note: the Pay (F10) button is used for ongoing transactions. For this page, the main focus is transaction history (Ctrl+F11).
Opening Transaction History (Ctrl+F11)
- From the cashier page, click TRANSACTIONS (Ctrl+F11).
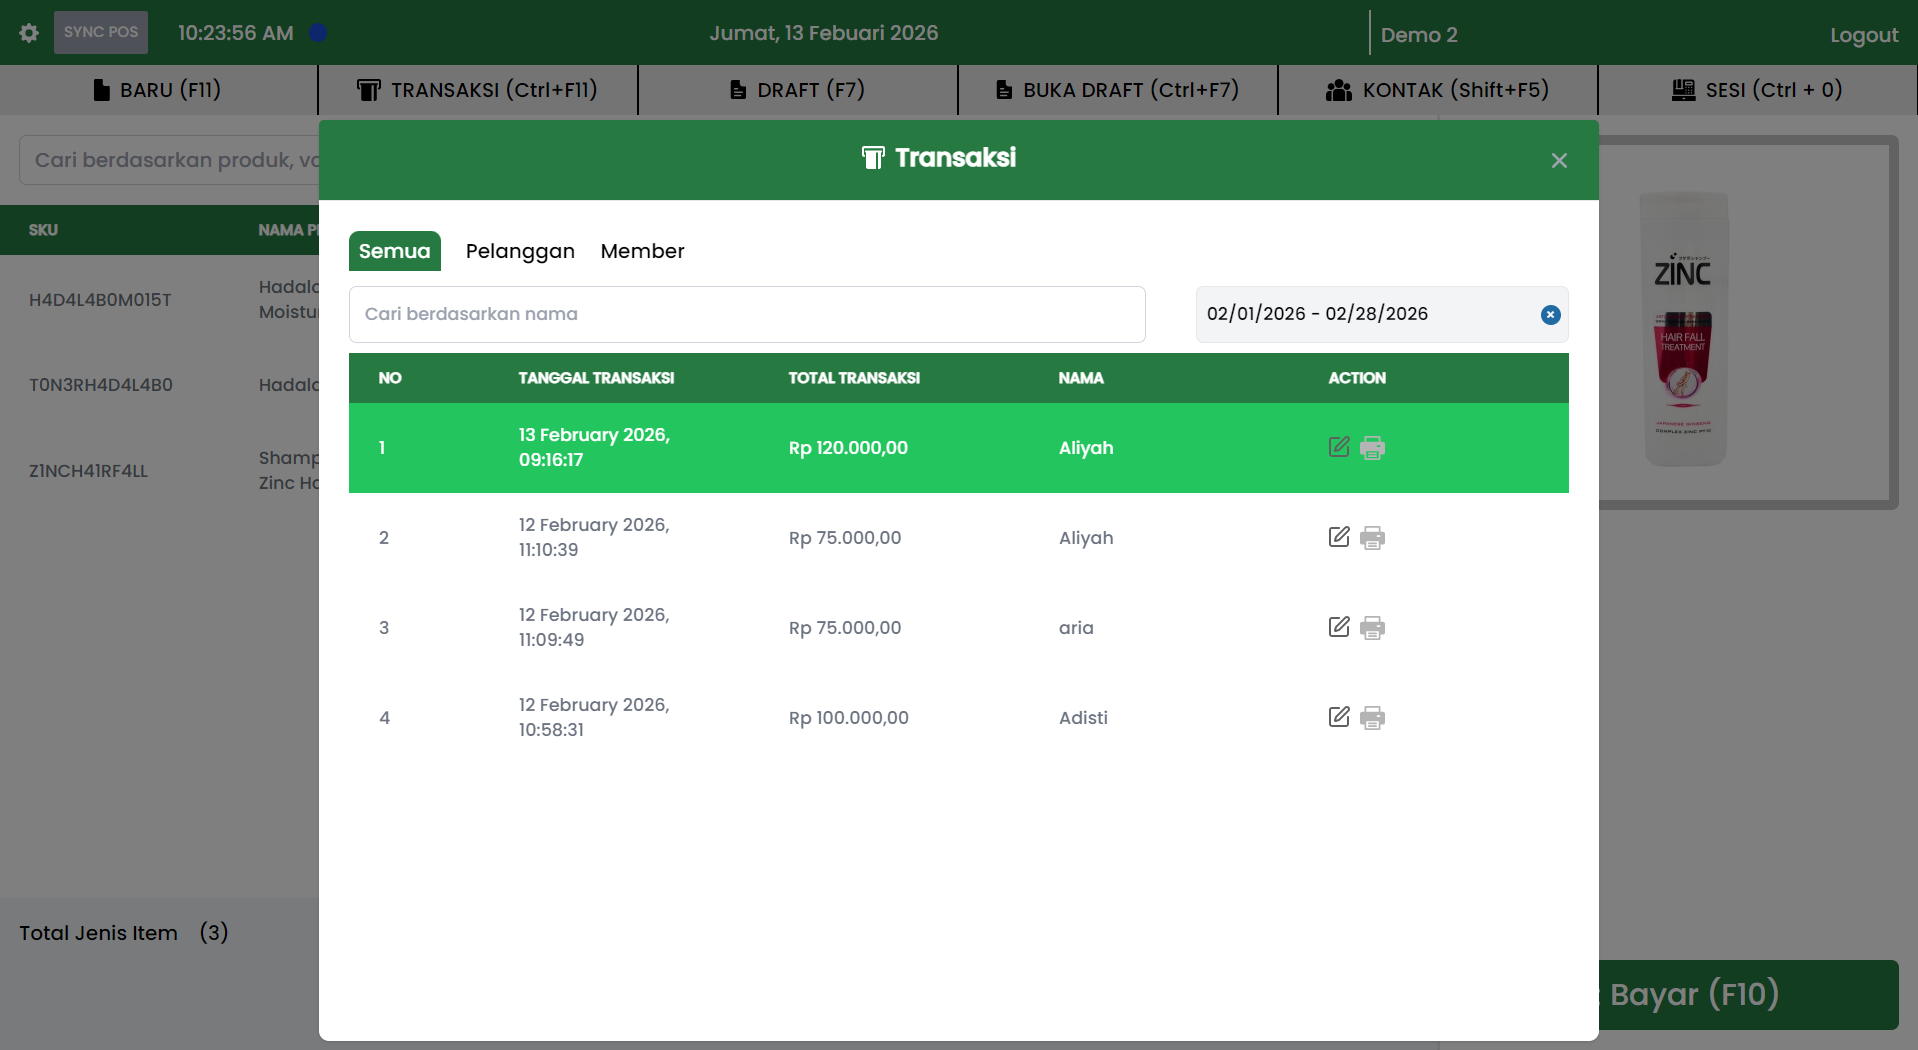
- The system displays a Transactions popup containing a list of saved transactions.
Filter and Search
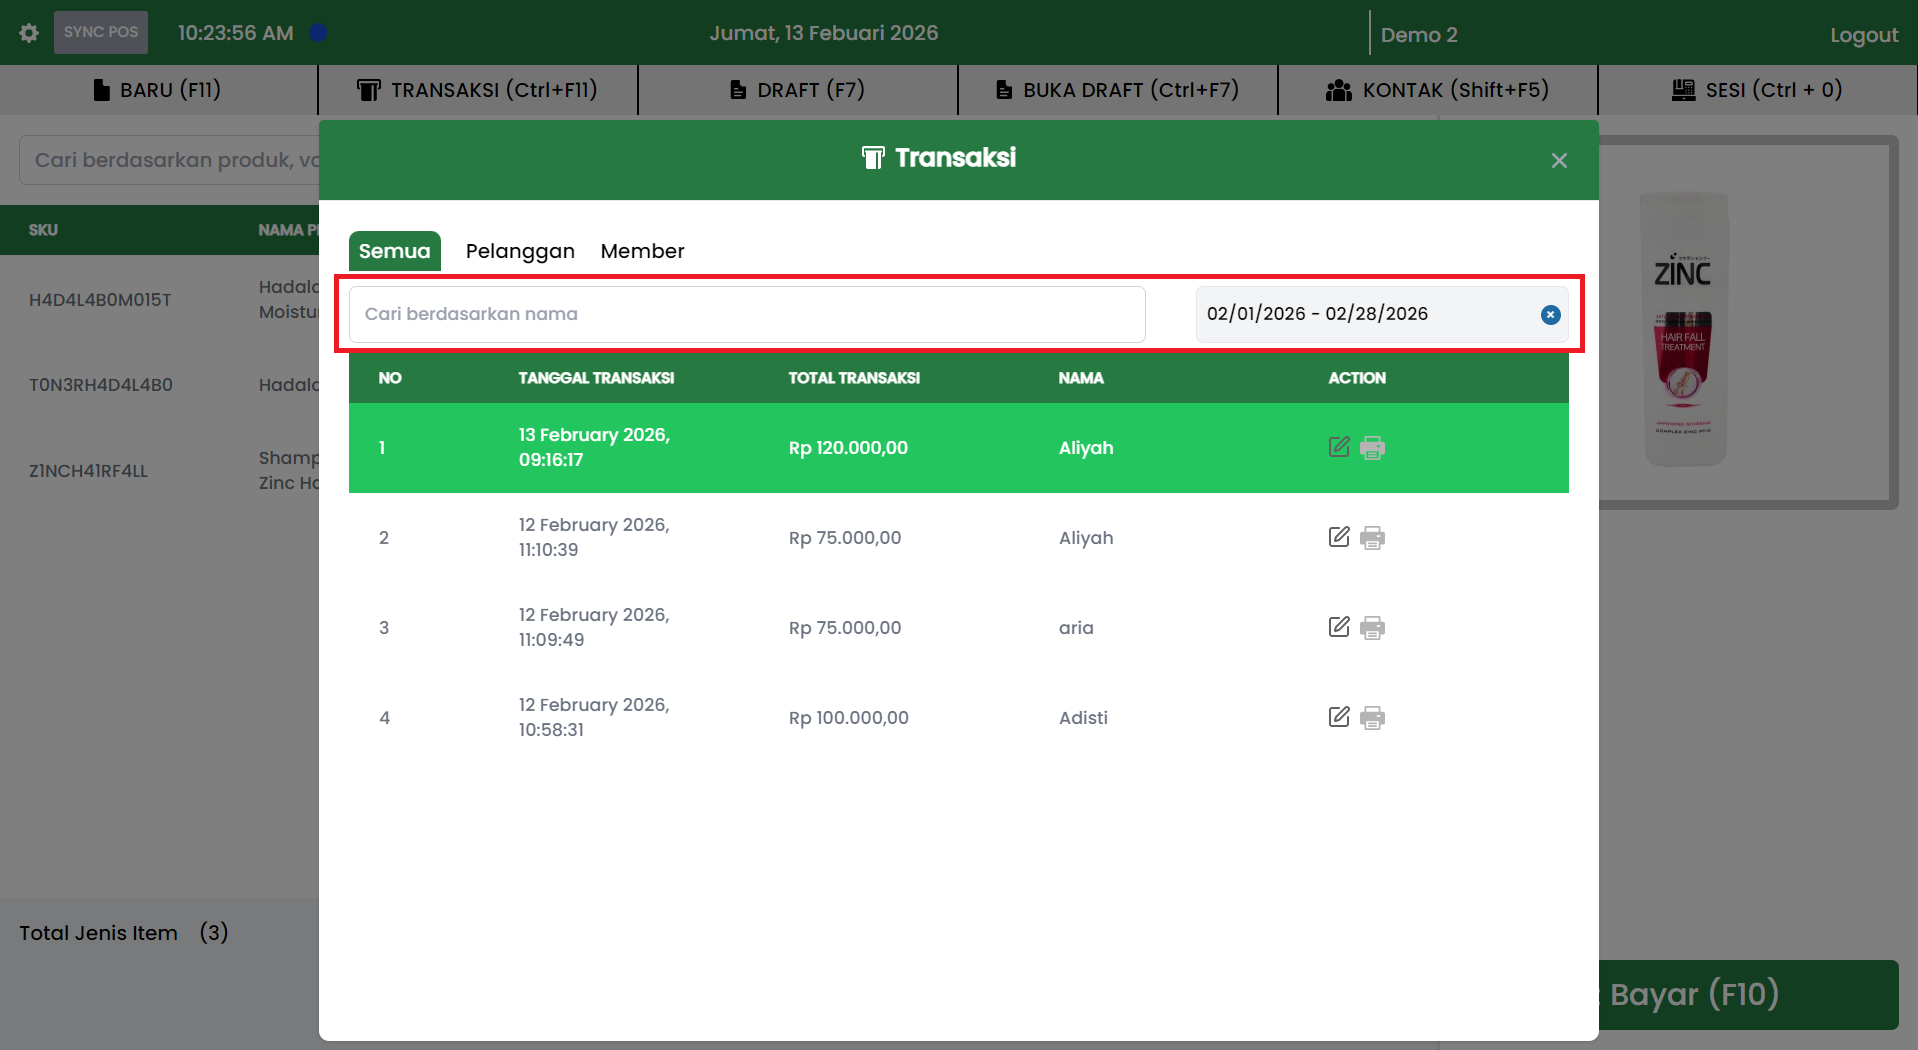
In the Transactions popup, the following are available:
- List tabs:
- All
- Customer
- Member
- Search: "Search by name".
- Date range filter.
Data Columns
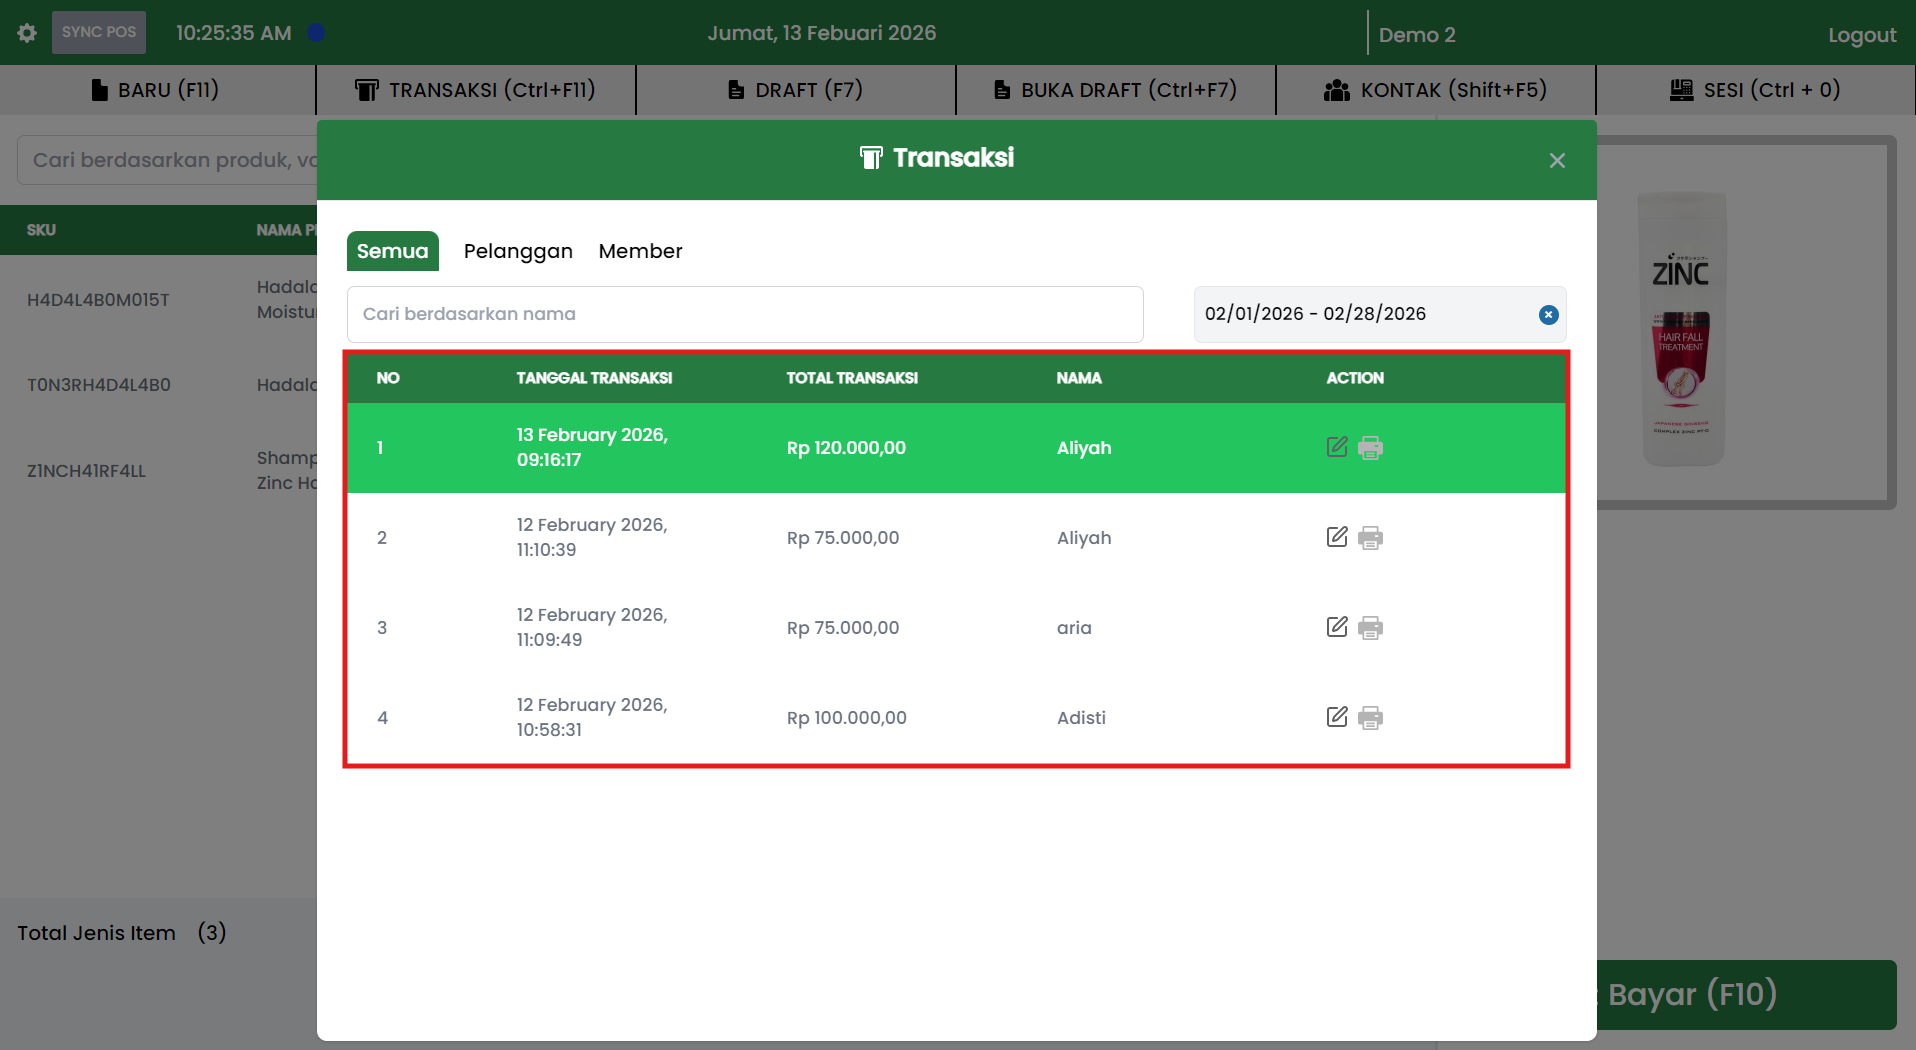
The transaction list table displays:
- No
- Transaction Date
- Total Transaction
- Name
- Action
Actions on Transaction History
In the Action column, the following are generally available:
- Edit / View Details (pencil icon)
Opens the transaction for review or modification (depending on access rights). - Print (printer icon)
Displays the invoice/receipt for printing.
Edit and print access rights follow role and authorization rules.
Modifying or Viewing Transaction Details (Edit)
General flow:
- Open the Transactions popup via TRANSACTIONS (Ctrl+F11).
- Use search or date filter to find the transaction.
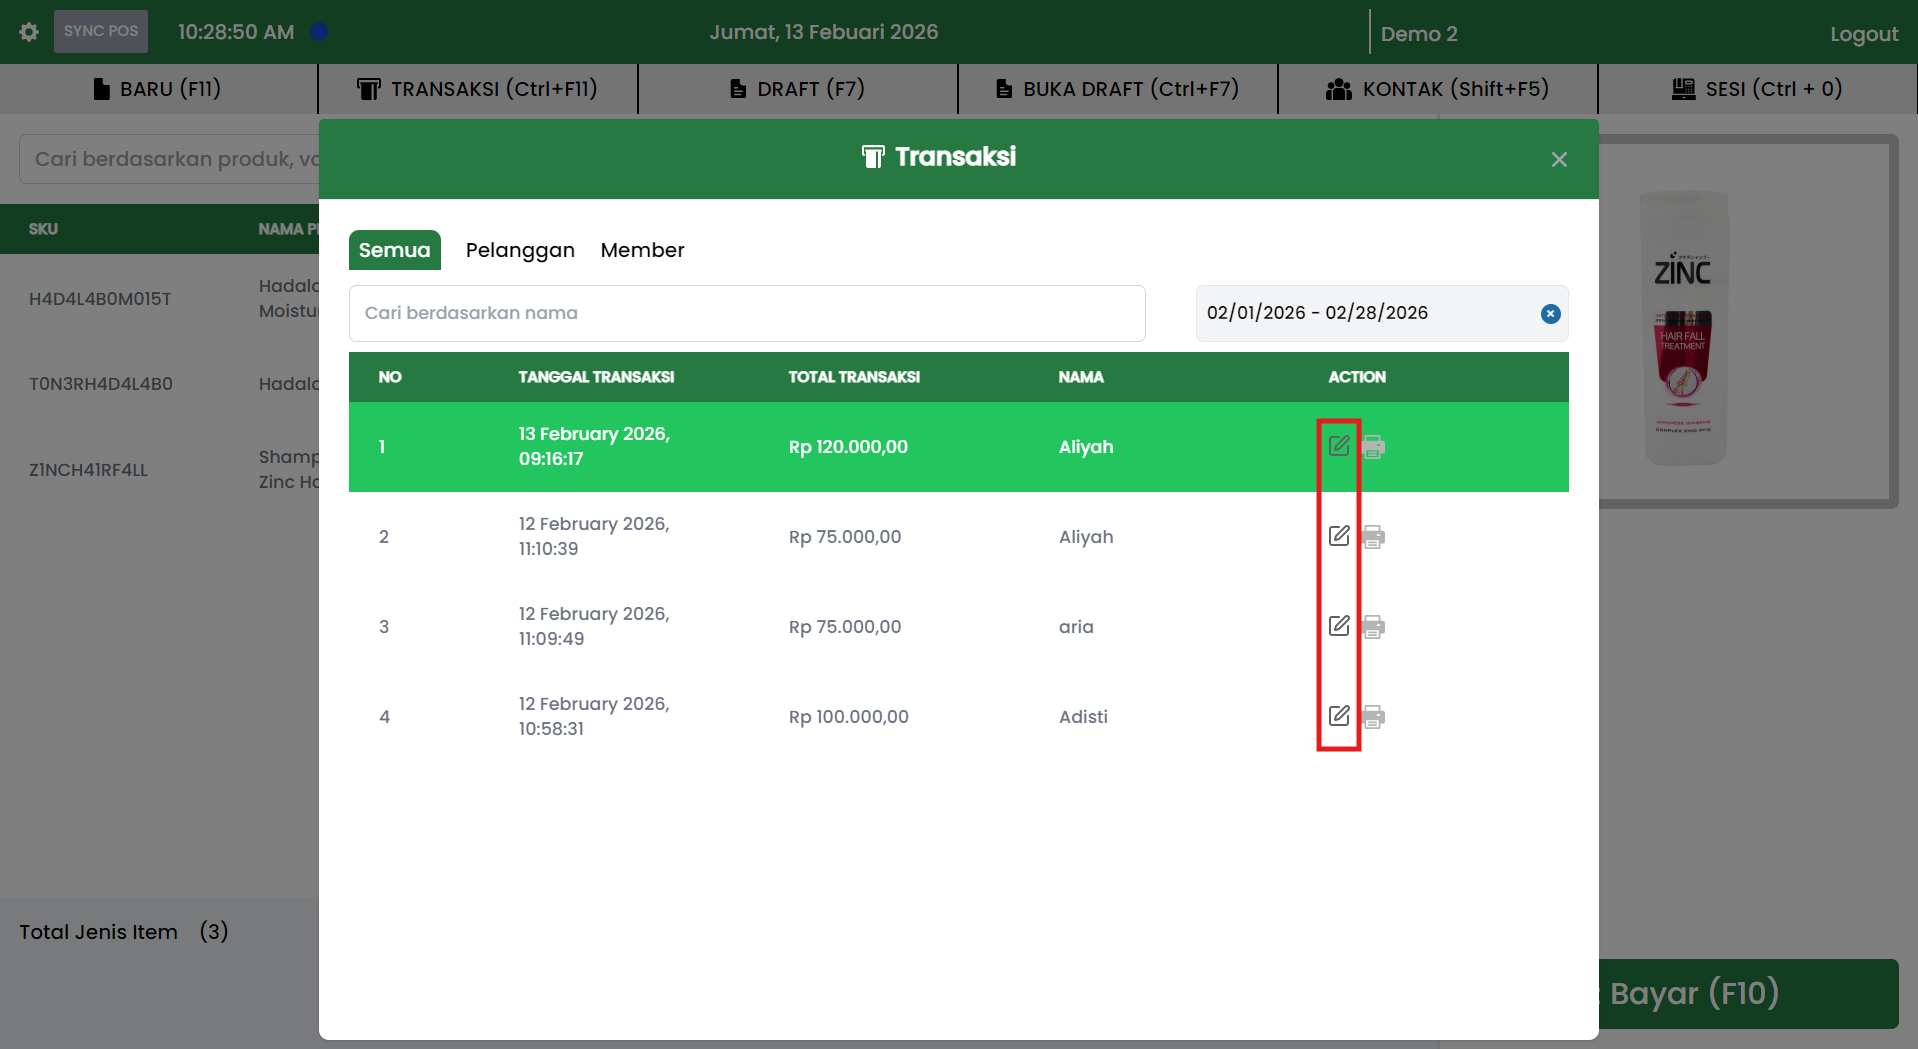
- Click the Edit (pencil) icon on the selected transaction.
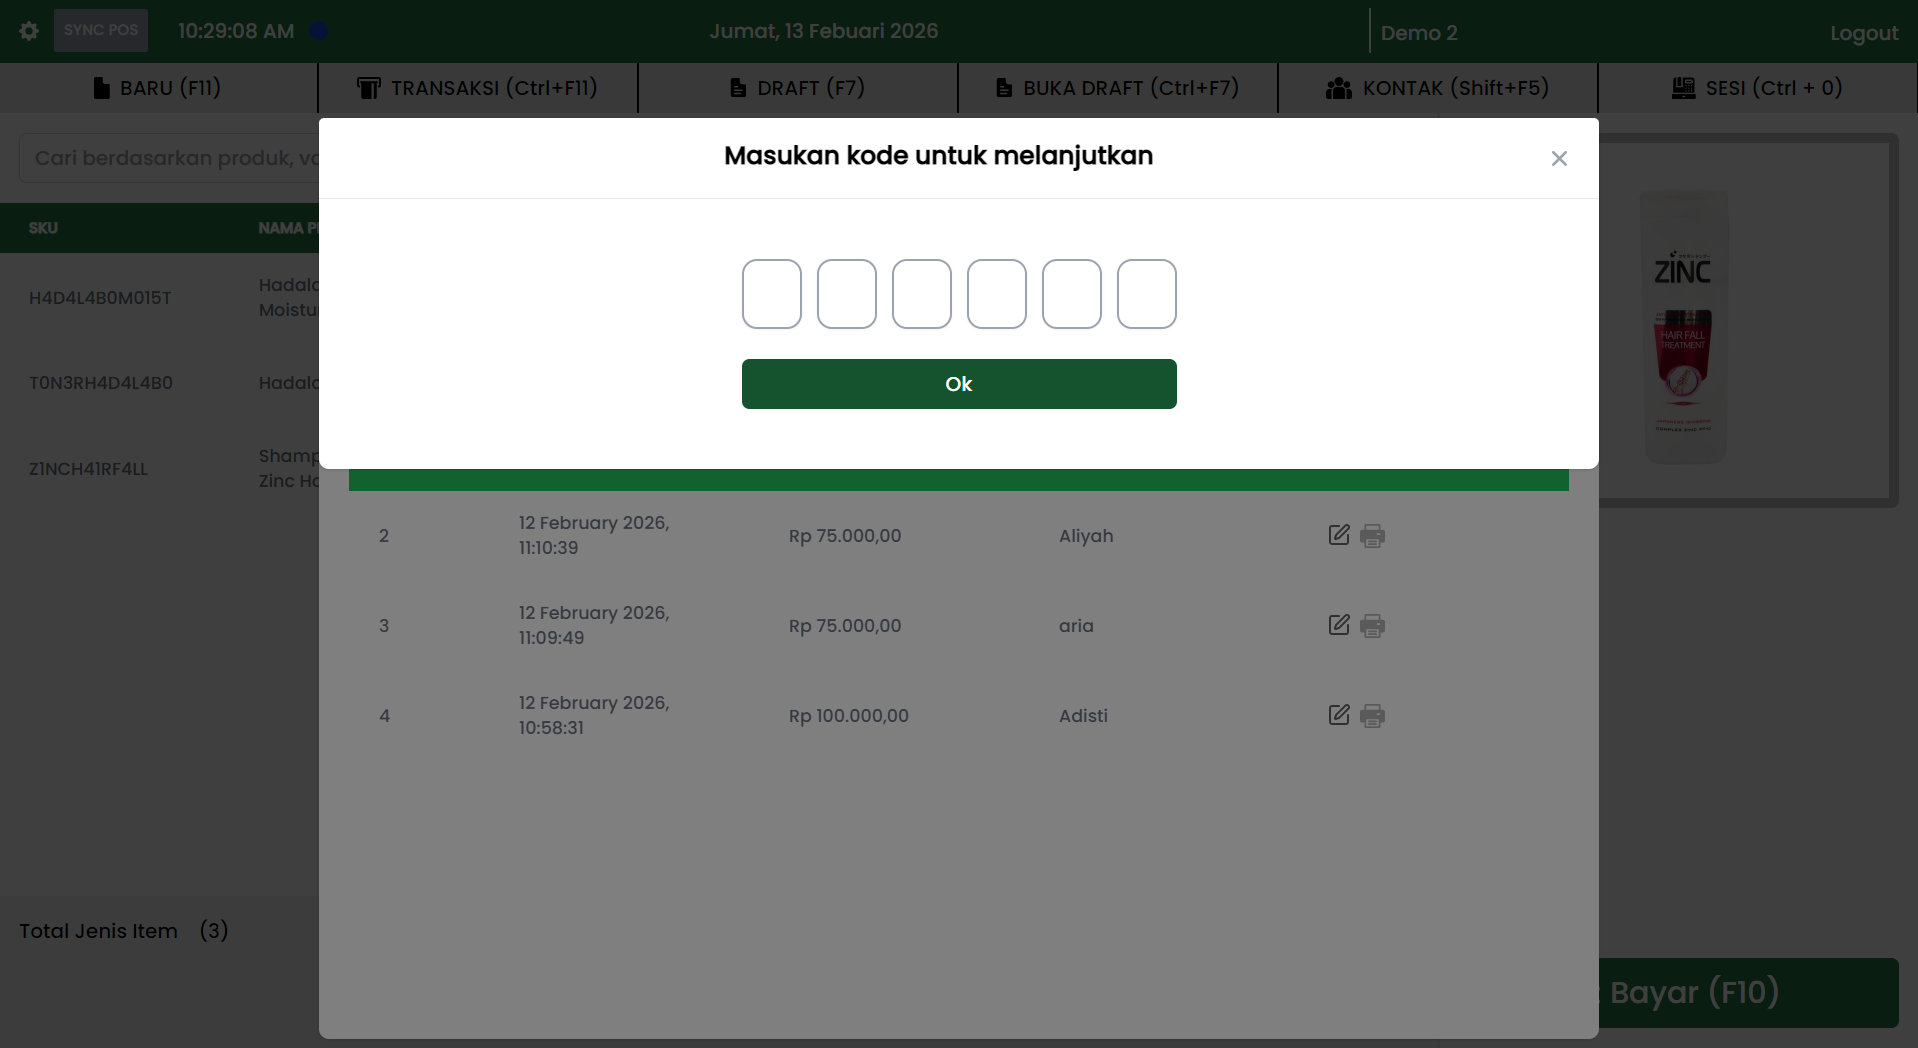
- If the system requests authorization, enter the code to continue.
- After passing authorization, make changes according to store policy.
POS Approval Code (Authorization)
For certain actions, the system may request an authorization code via a popup:
"Enter code to continue" then click Ok.
Code Format
The approval code can be a combination of letters (e.g.: M D V N D E) displayed in a special popup.
How to Generate a POS Approval Code
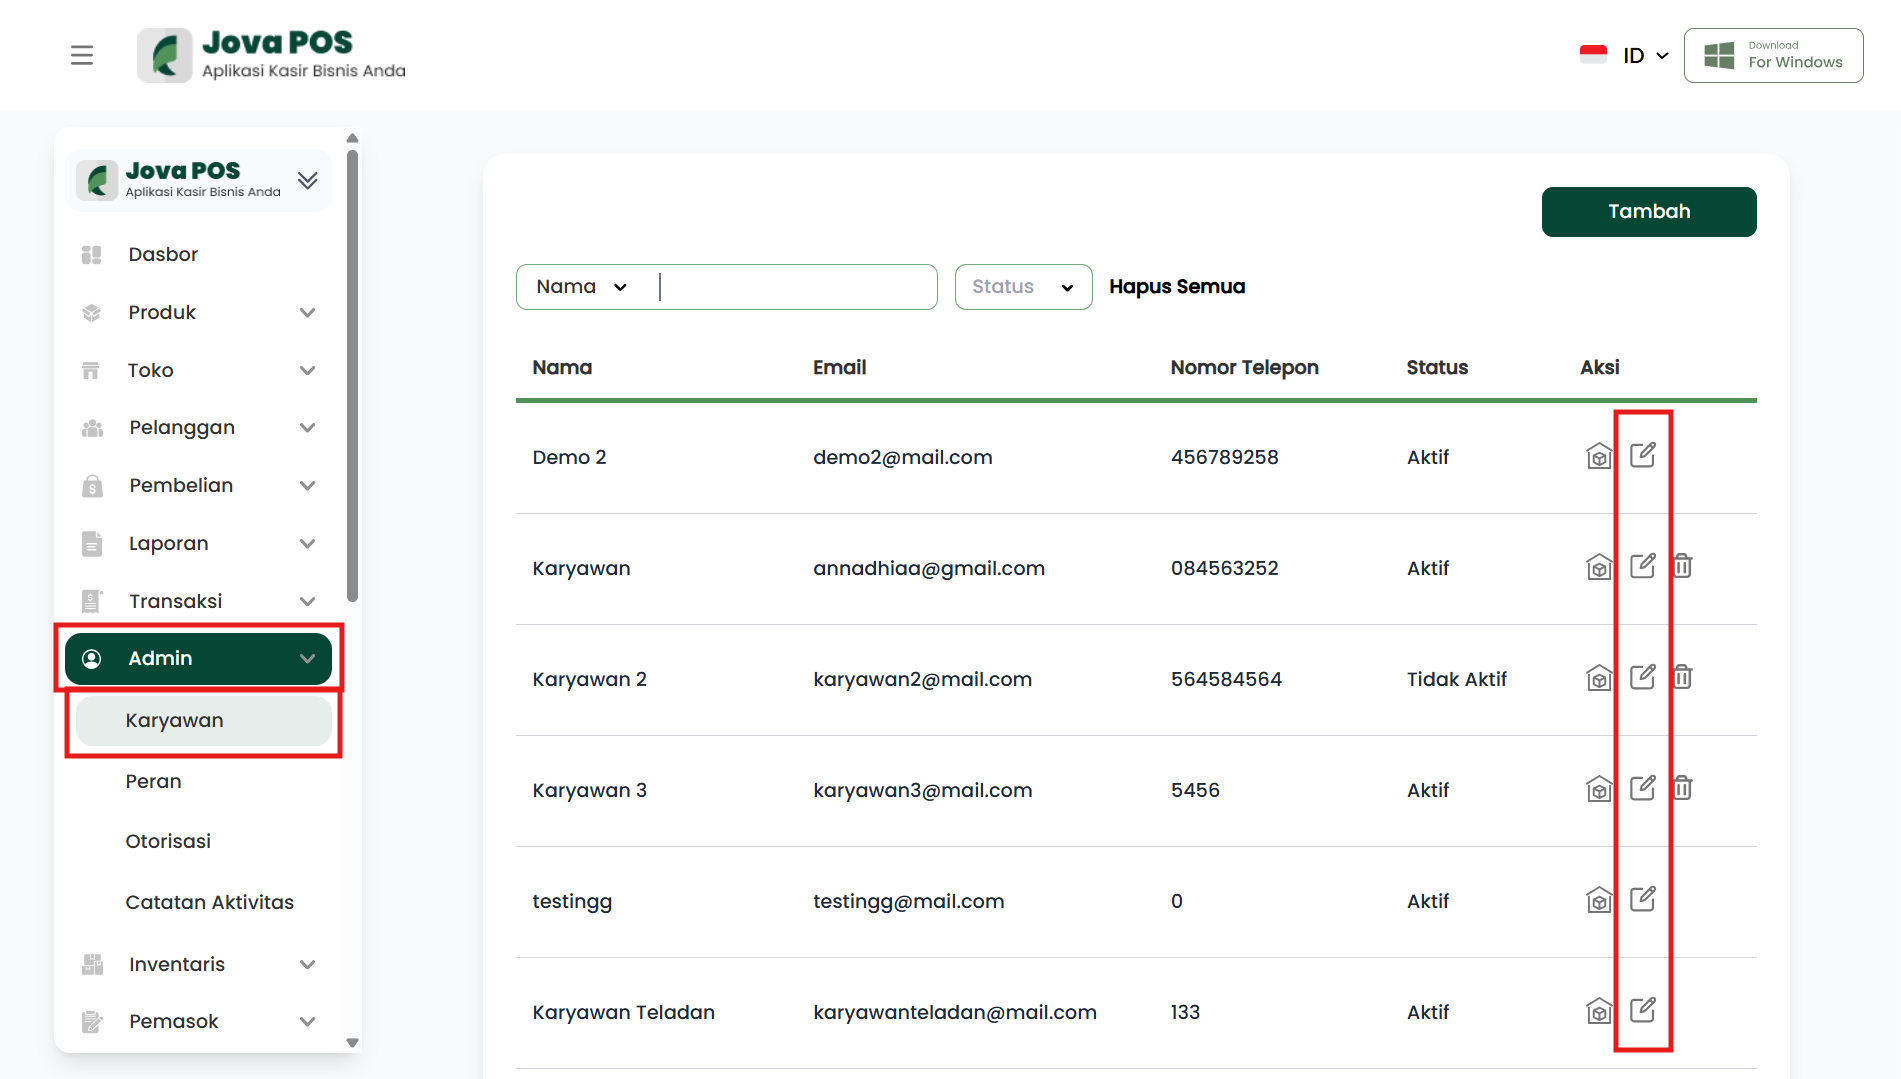
The code is generated from the web application (Admin menu):
- Go to the Admin menu.
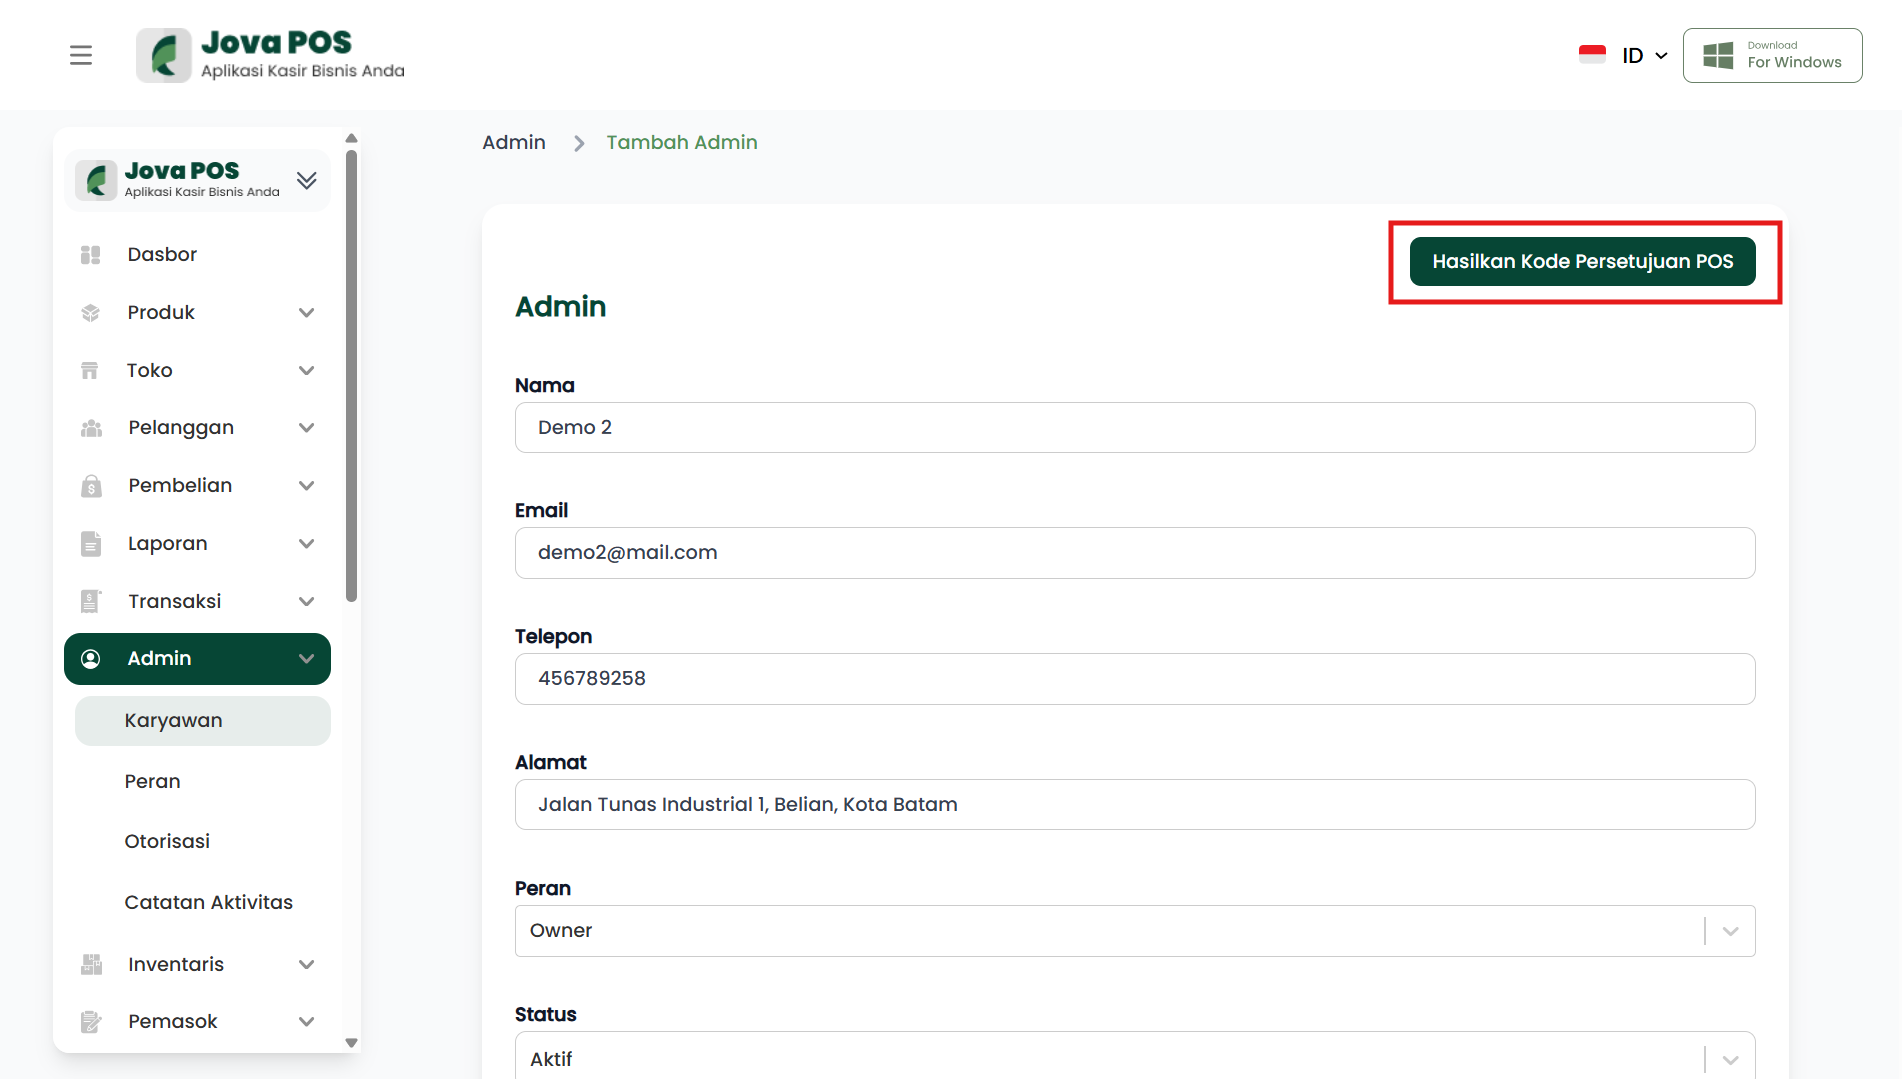
- Open the detail page or add Admin.
- Click the Generate POS Approval Code button.
- The system displays a popup: "Your POS Approval Code is".
- Click the COPY button to copy the code.
- Enter the code in POS when prompted.
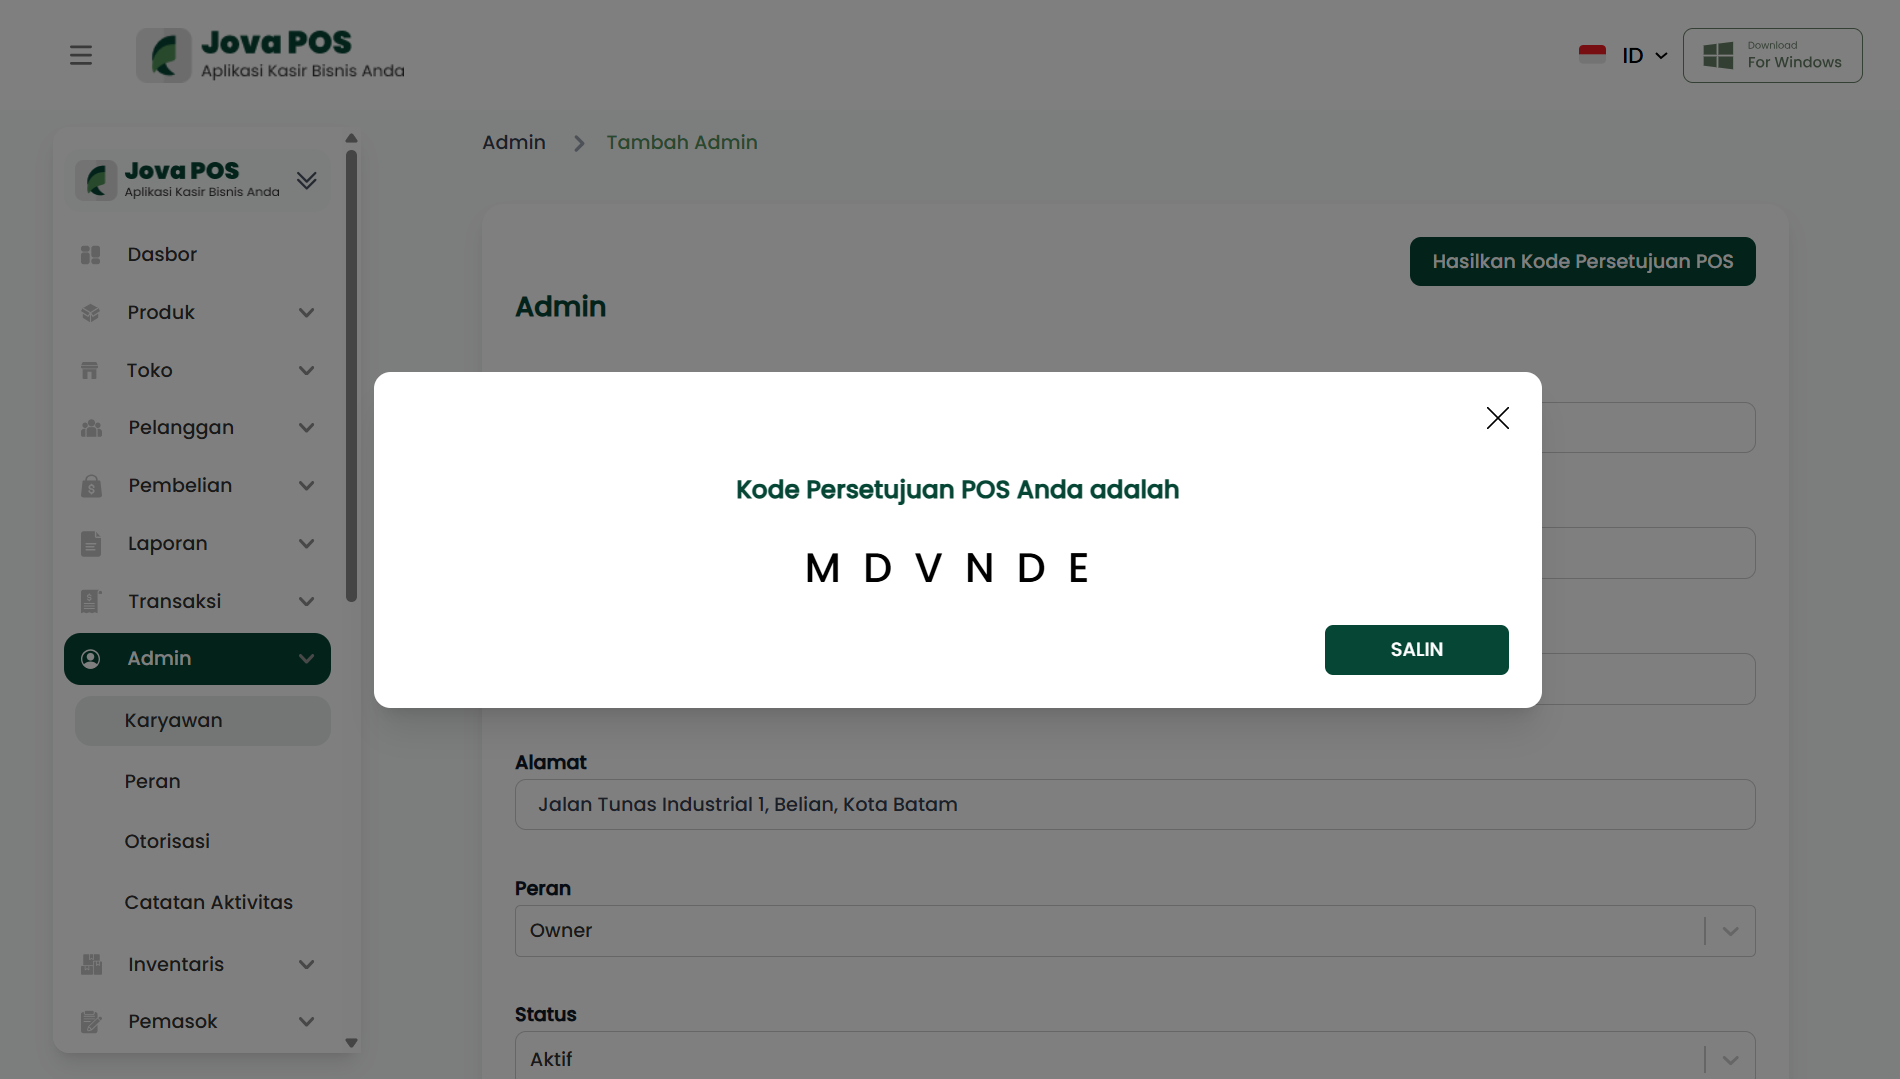
Note: the code is an access control mechanism. Limit code distribution to authorized personnel only.
Modifying or Viewing Transaction Details (Edit)
General flow:
- After obtaining the POS Approval Code, you can directly view or edit previously made transactions.
- Click Ok to process the authorization code.
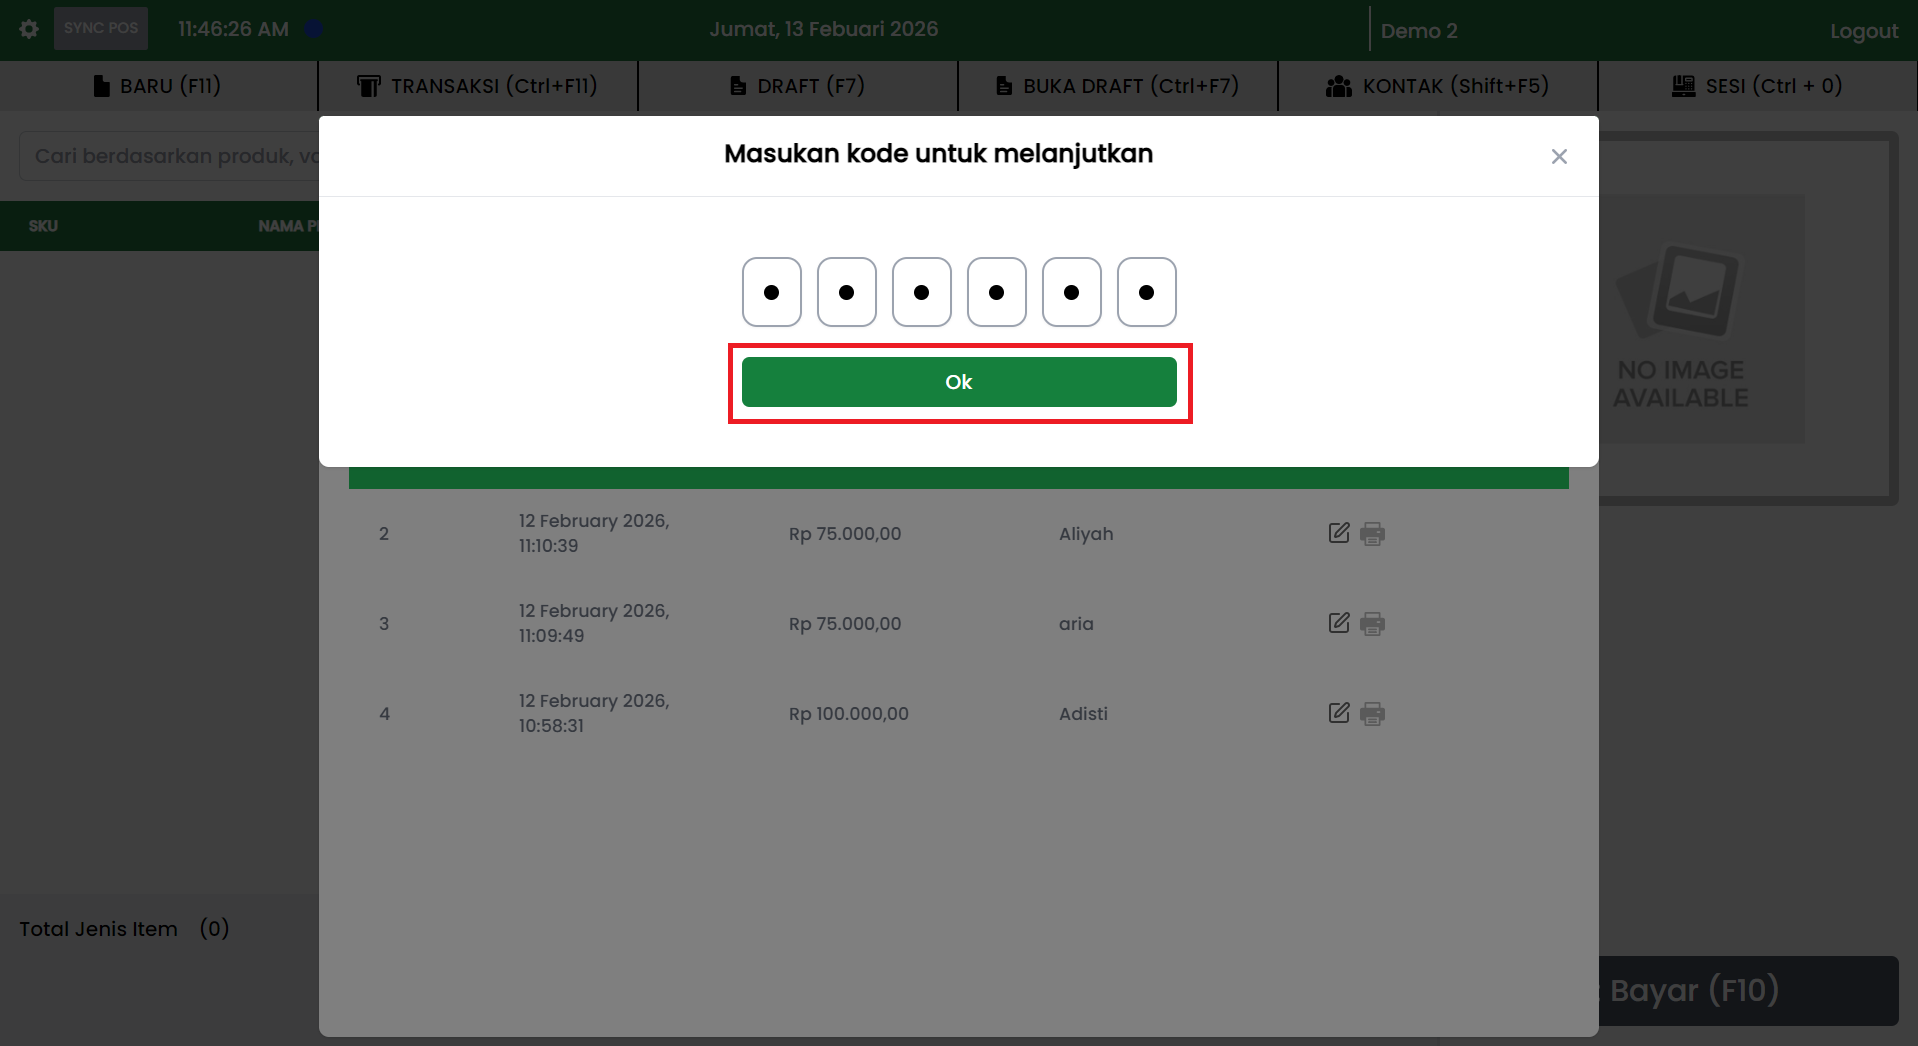
- If the code is valid, the system opens the transaction detail page.
- View transaction details or make changes according to permissions and store policy.
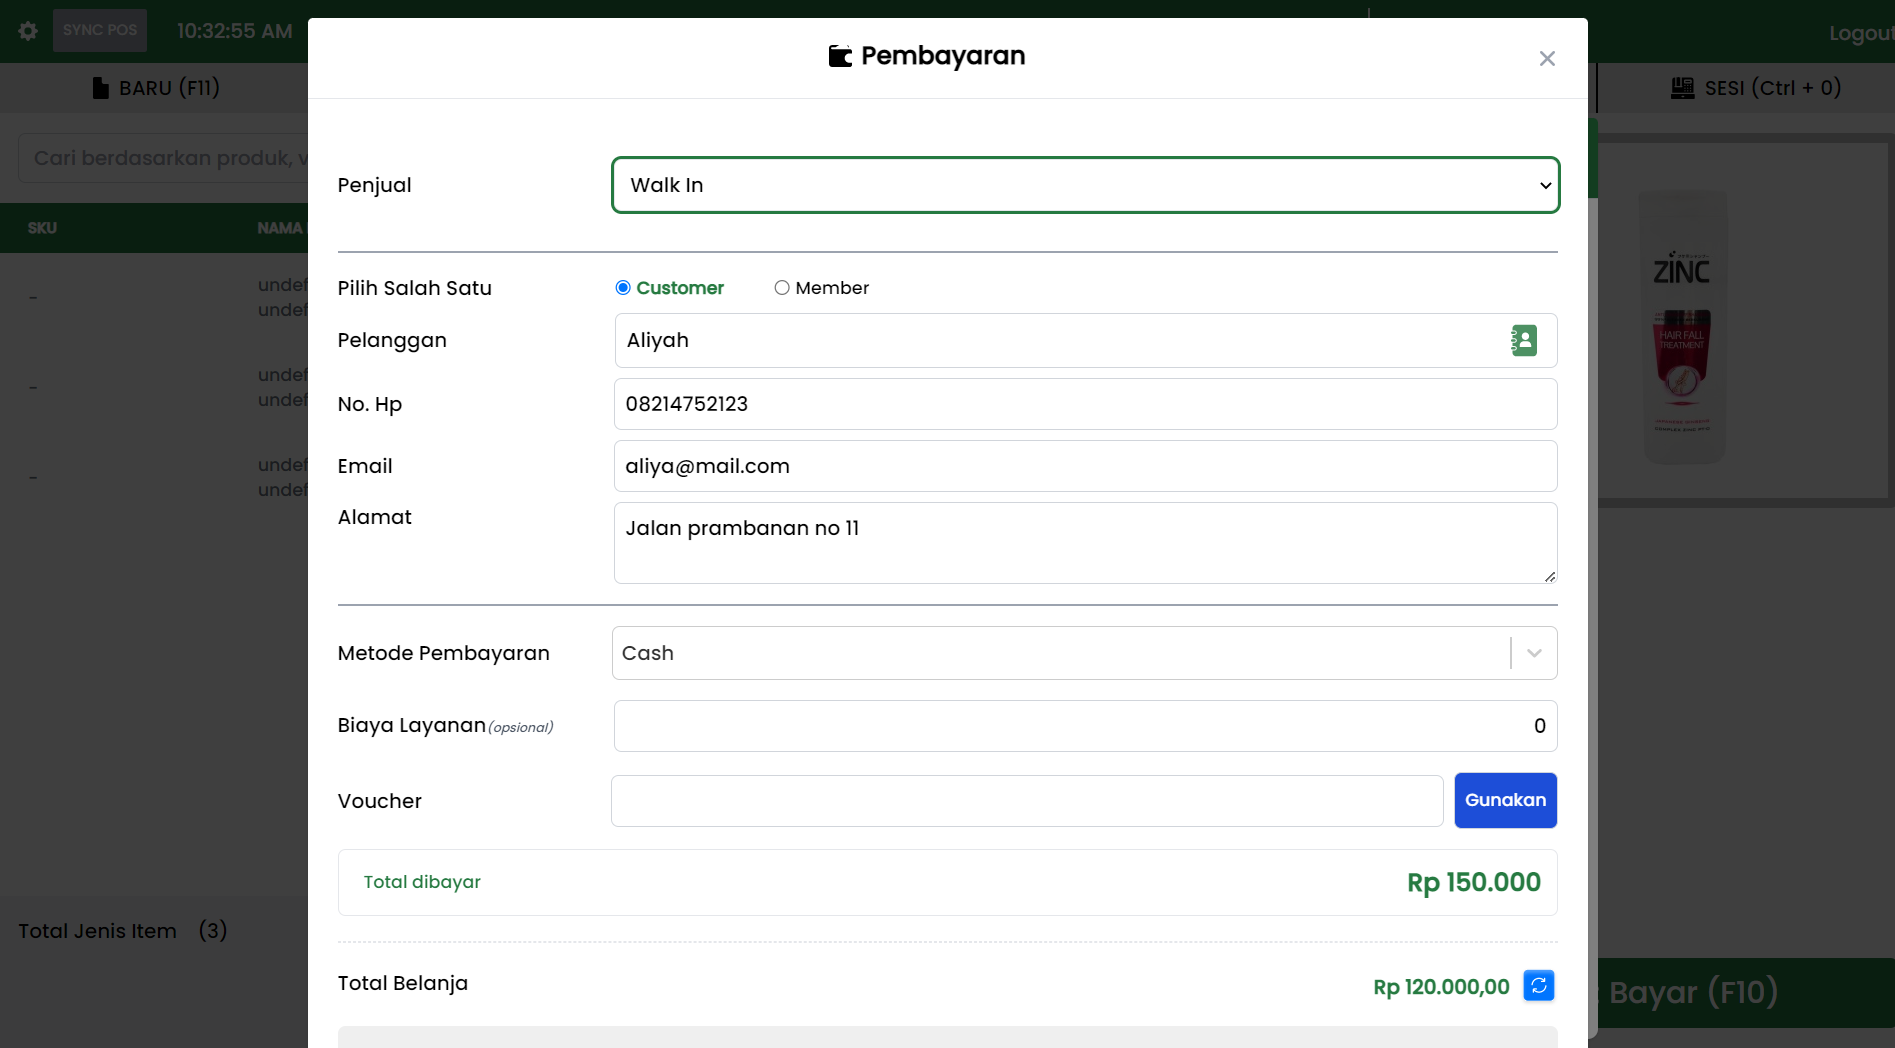
- Save changes (if any) according to the applicable system flow.
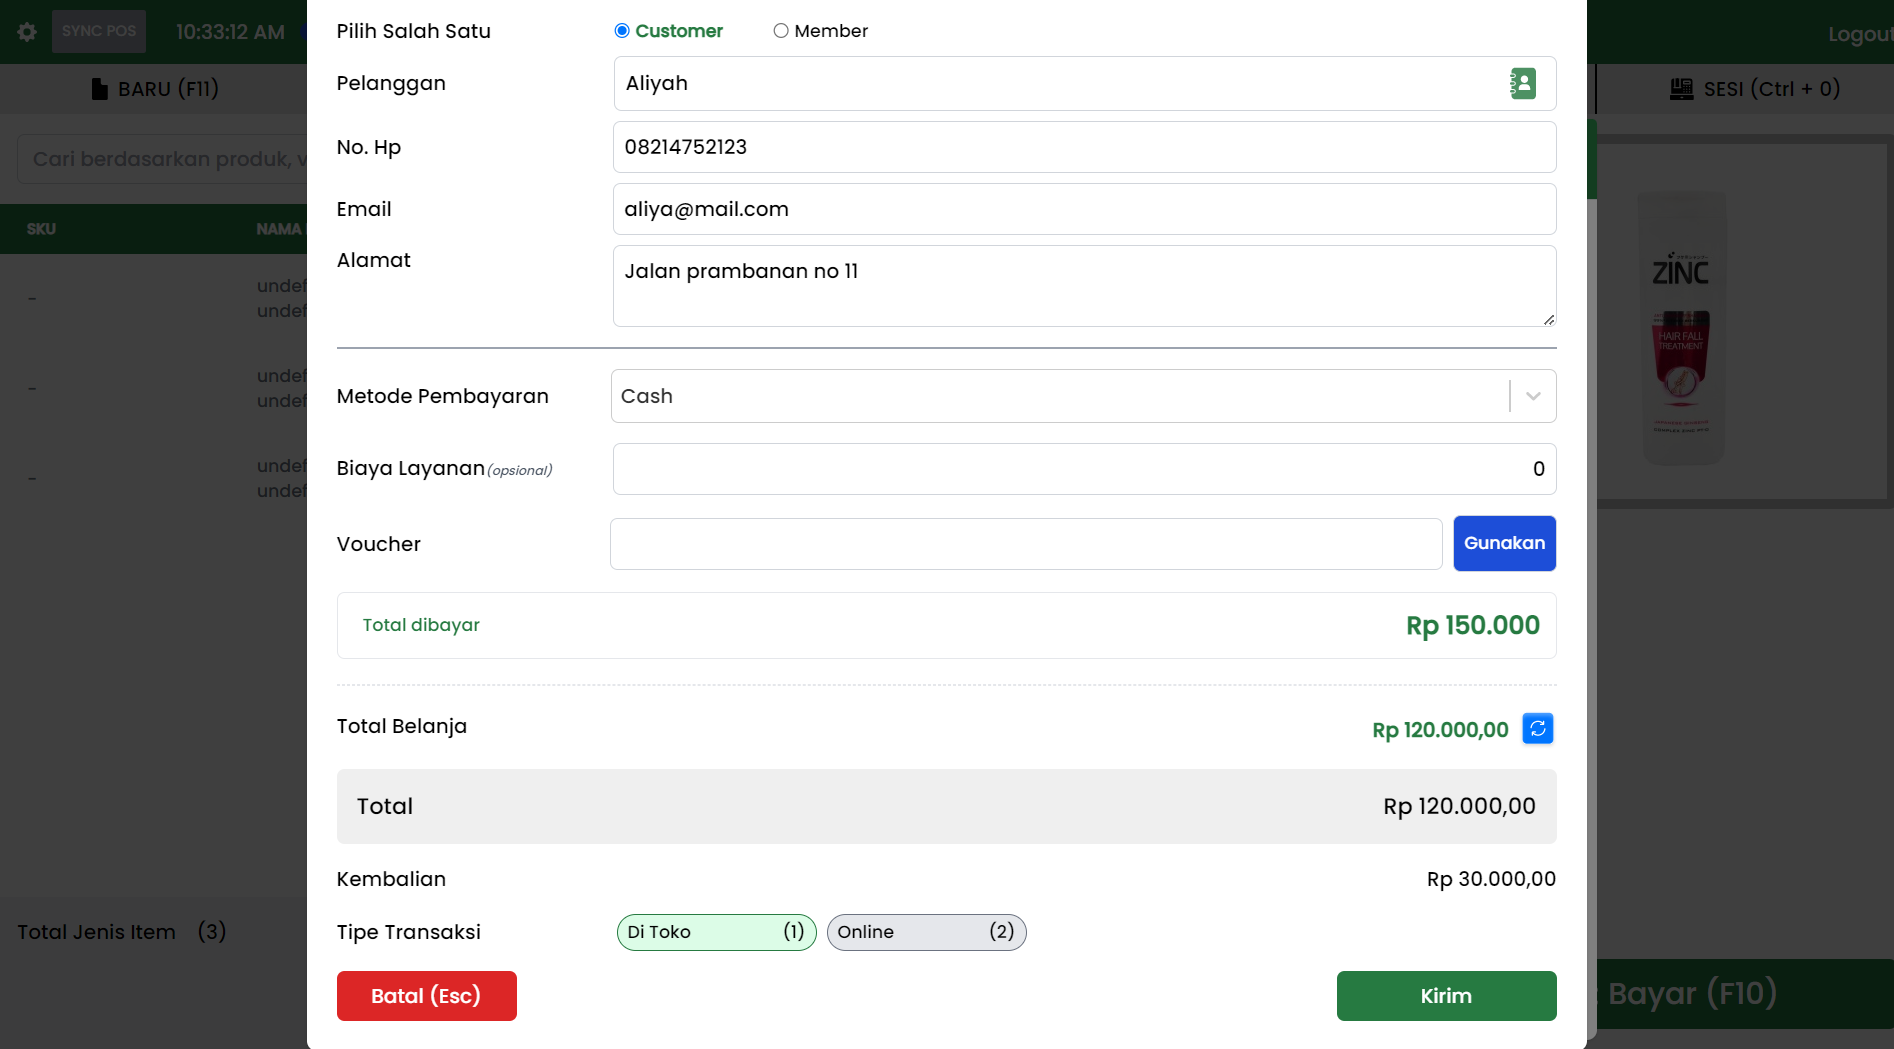
Additional step (optional): 9. If the cashier already has a POS Approval Code (e.g., already copied from the Admin menu), the cashier can directly select a transaction and enter the code when prompted to view or edit existing transactions without needing to generate a new code.
Printing Invoices or Receipts
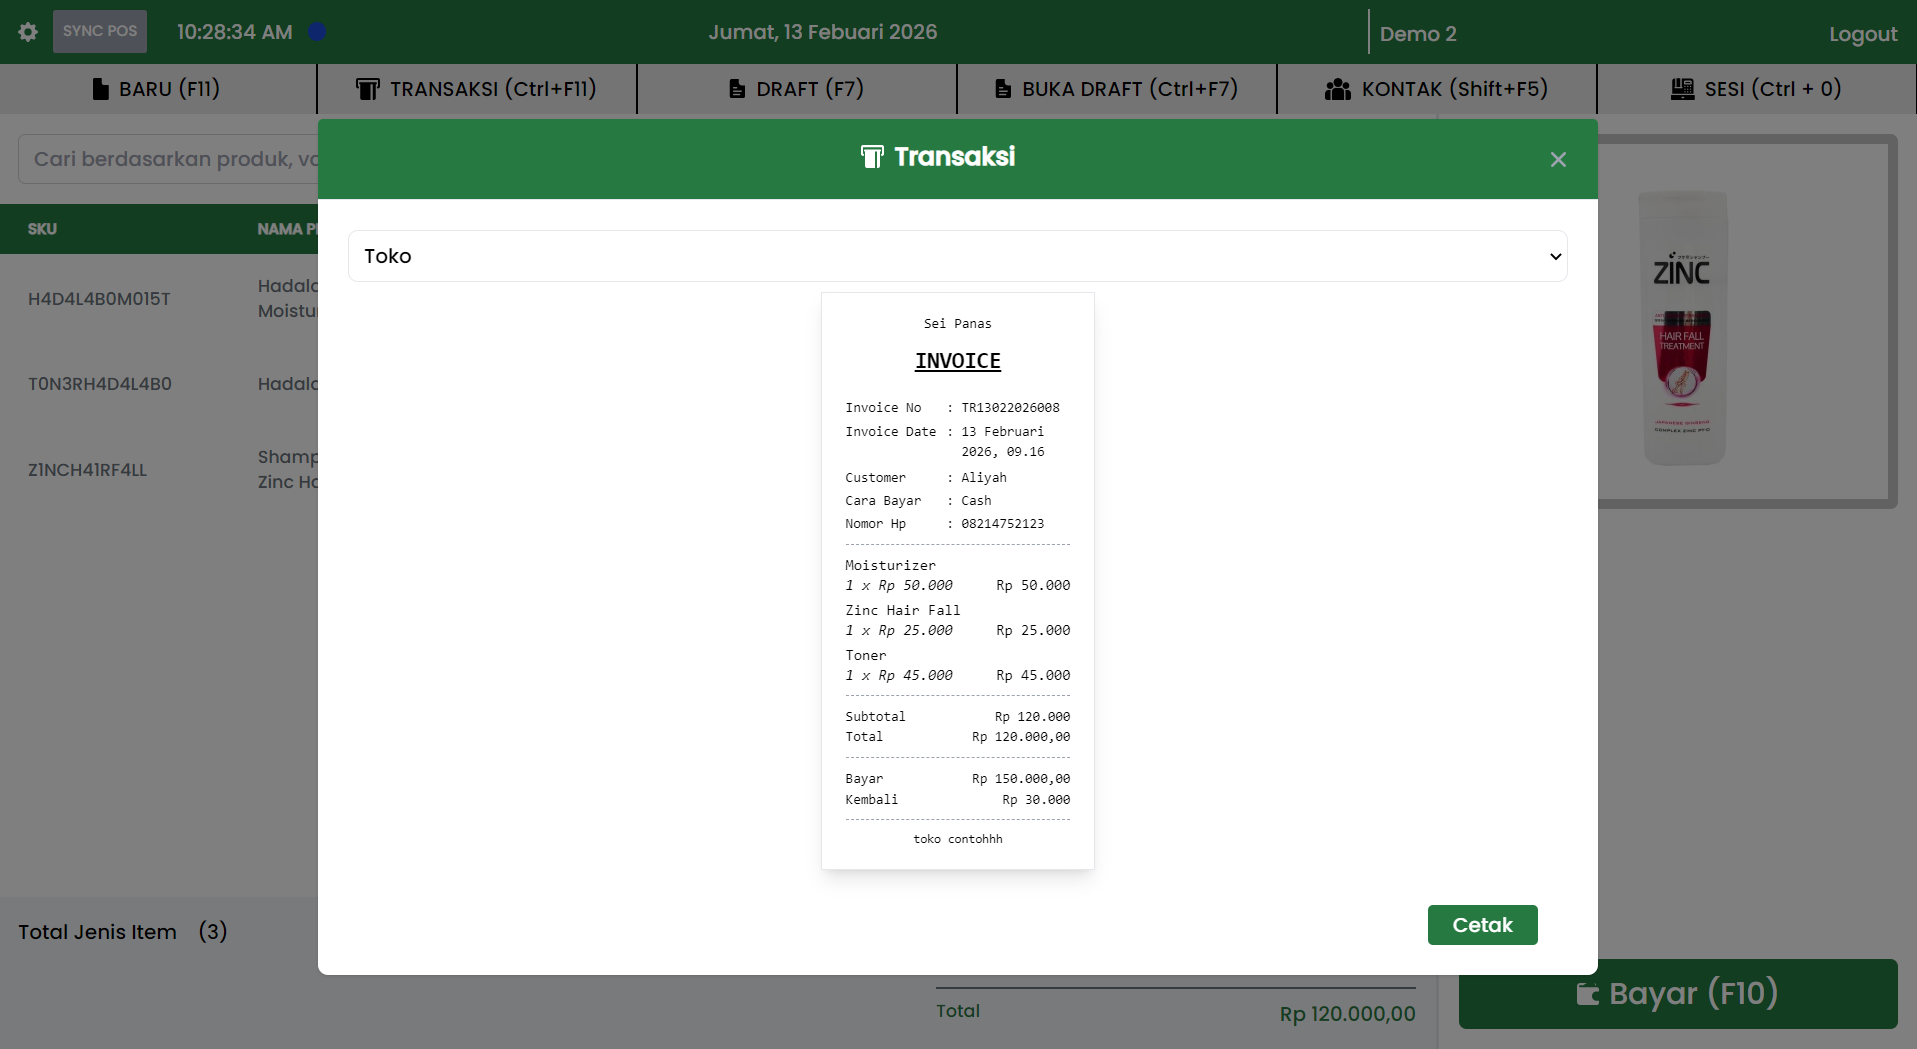
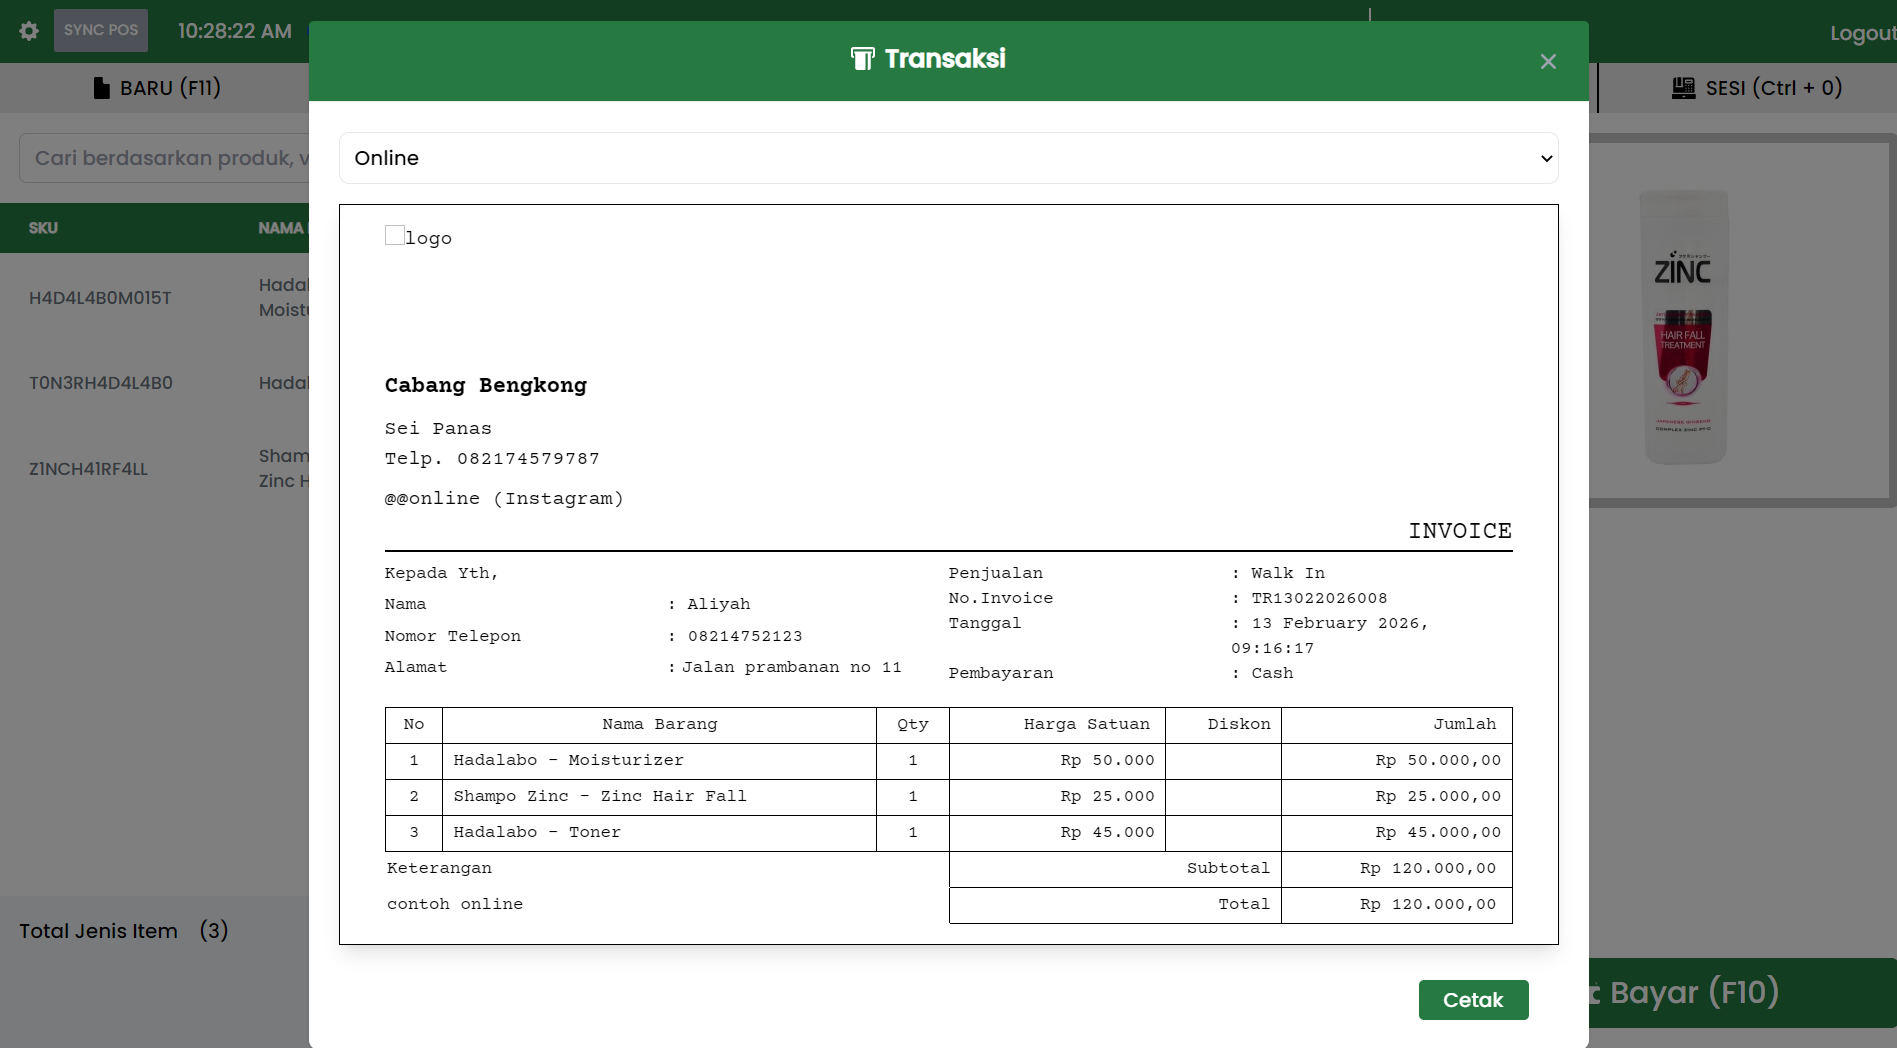
When selecting the Print action, the system displays an invoice preview that can be printed.
Invoice Types
Available format examples:
-
Store Invoice
- Compact receipt format.
- Displays items, subtotal, total, paid, and change.
-
Online Invoice
- More complete invoice format.
- Contains branch header, customer information, item details in a table, and total.
Print Process
- Select a transaction from the history.
- Click the Print icon.
- The system displays an invoice preview.
- Click the Print button to print.
Recommended Operational Practices
- Use date filters and search to find transactions faster.
- Only edit if permitted and in accordance with store SOP.
- Use the approval code only for authorization needs.
- Reprint the invoice after changes if needed as the latest proof.
- Make sure the code holder is an authorized person.